Blackmagic multi-cam setup for permanent install
Event Rigging Series: Part 6
Exploring the use of Blackmagic gear for events has been off my radar for some time, as I’ve been focusing on the lighting side of things. Now, I’m delving into the necessary equipment for a permanent multi-camera installation.
The goal is to create a straightforward setup, yet versatile enough to handle dual feeds to screens or projectors—one positioned at the stage’s rear and another for live feed being sent to image screens or used for streaming and recording purposes.
Additionally, the system will accommodate video playback and external video inputs, like laptops for presentations, and provide a clean feed for the dressing room monitors. Let’s dive in without further delay.
Cameras
I’ll be looking at two camera types, each serving a unique function:
The first type is stationary, ideal for locked-off shots such as a wide view from the front of the stage, a perspective from the stage’s rear facing the audience, or even an overhead angle of a drummer.
The second type is mobile, utilizing dollies, tracks, or jibs to provide dynamic footage and versatile camera positioning options.
Fixed Cameras
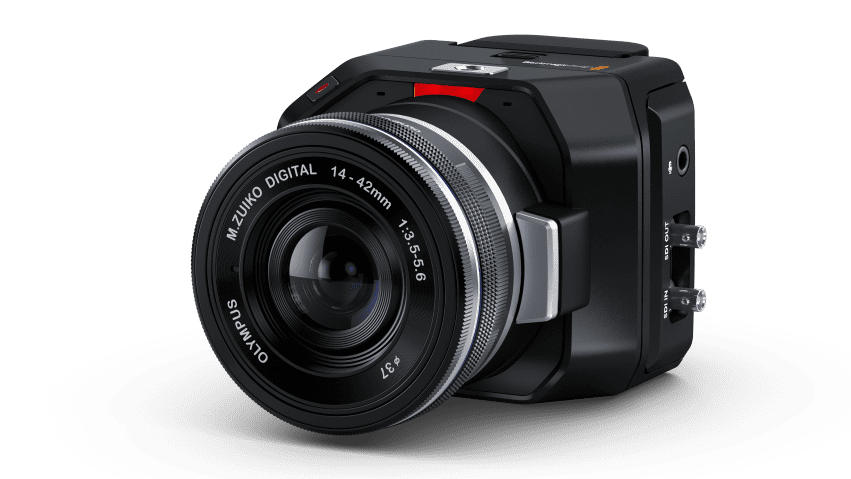
For the stationary cameras, I’ve chosen the discreet Blackmagic Micro Studio Camera 4K G2 coupled with the Panasonic LUMIX G X Vario PZ 45-175mm lens. This combination allows us to manage Focus and Zoom directly through the ATEM Switcher, which we’ll explore in more detail shortly.
With just two SDI cables, you can achieve wonders: one cable sends out the live feed from the camera, while the other lets you take charge of it. This setup grants you complete command over the camera’s focus, iris, zoom, colour correction, Tally Display, and even allows you to start and stop recording at will.
mini rant: Unfortunately, Blackmagic has not transitioned their MFT-based cameras to the EF mount. According to my research, merely 3-4 lenses support the Power Zoom feature, in stark contrast to the vast array of EF lenses that offer this capability.
The Blackmagic Micro Studio Camera 4K G2 packs broadcast-quality live production capabilities into a remarkably small frame. Its Four-Thirds sensor delivers 13 stops of dynamic range and exceptional performance in low light, ensuring Ultra HD image quality under any lighting.
The camera features 12G-SDI Micro BNC connectors for 10-bit uncompressed video up to 2160p60 and dual-channel audio output. Inputs include support for tally, camera control, the built-in colour corrector, and lens control via an ATEM switcher.
The camera can also double as a Hollywood-grade cinema camera, recording Blackmagic RAW on external USB-C drives.
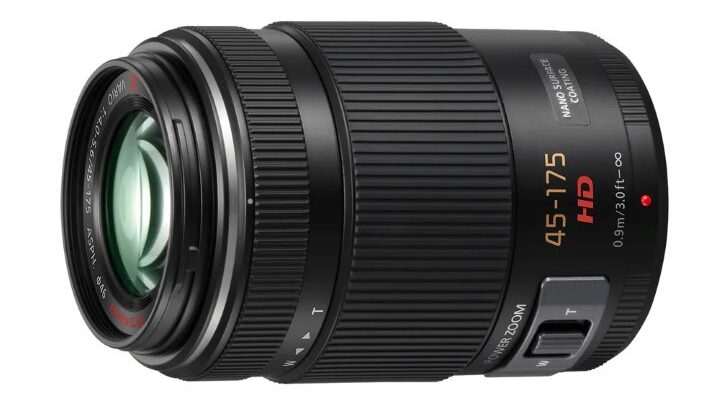
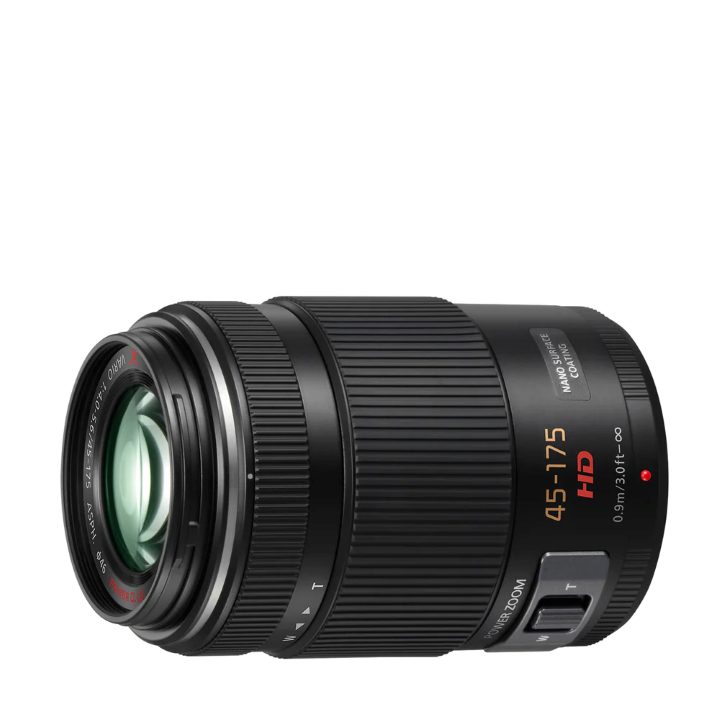
The Panasonic Lumix G X Vario PZ 45-175mm f/4.0-5.6 is a versatile zoom lens designed for Micro Four Thirds cameras, offering a moderate telephoto range. It features both manual and power zoom capabilities, controlled by a rocker switch, which is particularly advantageous for video recording due to the smooth zooming action.
The lens is equipped with Panasonic’s “nano surface coating” to enhance contrast and minimize lens flare. Additionally, the front element of the lens does not extend or rotate, which is ideal for using polarizing filters.
The lens boasts a focal length of 45-175mm (equivalent to 90-350mm on a 35mm camera), an aperture range of f/4-5.6, a minimum focusing distance of 0.9m, a maximum magnification of 0.4x, and is constructed of 14 elements in 10 groups.
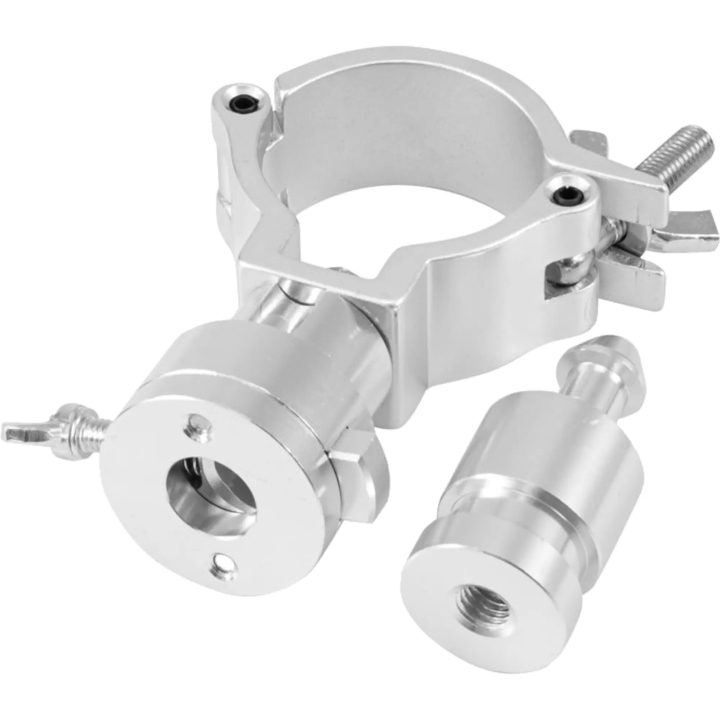
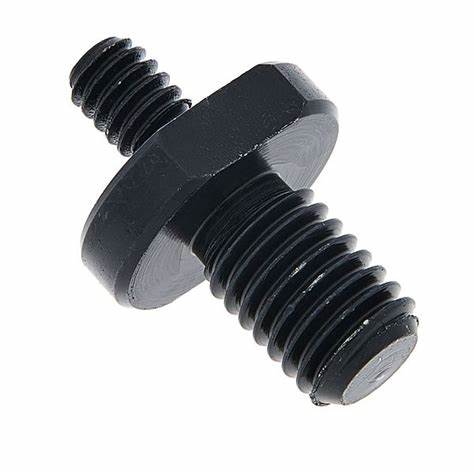
I’ve devised a solution for mounting the camera to the truss: using a truss clamp with an attached TV spigot and then converting that to a 1/4″ thread for the camera connection. This method also allows for the camera to be easily detached when necessary.
Mobile Cameras
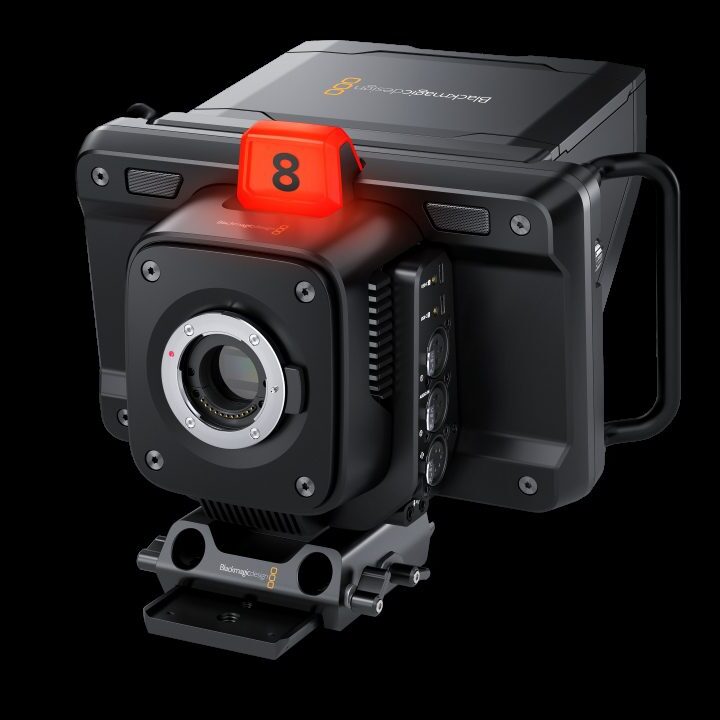
With the fixed cameras ready, it’s time to focus on the mobile units. I’m going with the Blackmagic Studio Camera 4K Pro G2s for its robust design, tailored for high-end SDI switchers. They boast professional 12G-SDI and 10G Ethernet connections, ideal for setups where the camera is far from the switcher. They feature a 12G‑SDI output, a 12G‑SDI program return input with camera control, talkback, and tally, alongside a powerful HDMI output with similar control capabilities. The 10G Ethernet connection simplifies cabling with a single line for a cost-effective SMPTE-style workflow.
The camera comes with Blackmagic’s advanced generation 5 colour science, producing stunning cinematic images. Its unique design combines the benefits of a large studio camera with a viewfinder in a single, lightweight unit. The camera’s gain ranges from -12dB (100 ISO) to +36dB (25,600 ISO), ensuring exceptional low-light performance with minimal grain and noise, and maximizing the sensor’s dynamic range—perfect for poorly lit locations. Plus, it features built-in colour correctors.
Constructed from advanced carbon-fibre-reinforced polycarbonate, the camera is both lightweight and incredibly durable. The ergonomic design places all external connections on the tripod handle side, and the folding sunshade allows for rapid setup.
A prominent built-in tally light on the cameras indicates the on-air camera, visible from a distance. Additionally, there’s a rear tally light under the sunshade, so the operator knows they are on air. The tally system is versatile, functioning via SDI, HDMI, or Ethernet. Using Ethernet, the Blackmagic Studio Converter also offers standard tally GPI inputs.
The camera boasts a full HD resolution viewfinder with a bright display and wide viewing angle, a feature previously only found in very expensive studio cameras. This aids in better focusing and framing. It includes a sunshade for outdoor use, which folds to protect the screen and can be easily detached, or swapped with the metal sunshade from the URSA Studio Viewfinder.
In the fast-paced world of live production, having immediate access to all camera controls is crucial. The viewfinder LCD doubles as a touchscreen, offering on-screen menu navigation for setting adjustments. You’ll find knobs for managing LCD brightness and contrast, plus a focus peaking knob for precise focus calibration. Touchscreen parameters also allow for adjustments in colour temperature, gain, audio levels, and more. Additionally, the camera features a program return and customizable buttons for added convenience.
Photographic lenses, known for their high-resolution capabilities and widespread availability, are excellent for high-end television production. With MFT and EF lens mounts, you have the freedom to select from an extensive variety of lenses across different brands. These lenses often deliver broadcast-quality results with precise focus and zoom, allowing for the addition of optional focus and zoom demands to operate the camera akin to a professional broadcast unit.
The camera boasts an appealing design while ensuring all connections are logically arranged. Video input and output connections are located on the right, whilst on the left, you’ll find ports for talkback, audio inputs, USB, and more, which is particularly handy for headphone users as it prevents cable entanglement.
The Blackmagic Studio Camera is equipped with a standard barrel jack power connection featuring a locking ring to prevent accidental disconnections. The camera also has some additional connectivity options, including a 4-pin broadcast-style XLR power connection. When paired with the Blackmagic Studio Converter for Ethernet connectivity, the camera can be powered solely through the Ethernet link, eliminating the need for local camera power sources (a feature I was was available on the micro studio camera above).
I will utilize the camera’s MFT mount and equip them with Panasonic Lumix G X Vario PZ 45-175mm f/4.0-5.6 lenses, identical to those used on the micro studio cameras, ensuring a uniform appearance across all our cameras.
As we’re dealing with mobile cameras, we’ll need a method to move them around. I plan to employ three techniques for this movement: Dolly, Track, and Jib Arm. We’ll delve into the Jib Arm in more detail later, as it requires some specialized components to fully assemble.
The Dolly Setup
A dolly, in its simplest form, is a set of wheels attached to the base of a tripod, transforming it into a mobile platform. While some might offer a lengthy discourse on its intricacies, the essence remains straightforward. Our objective is to select a quality tripod and equip it with suitable wheels for enhanced mobility and versatility.
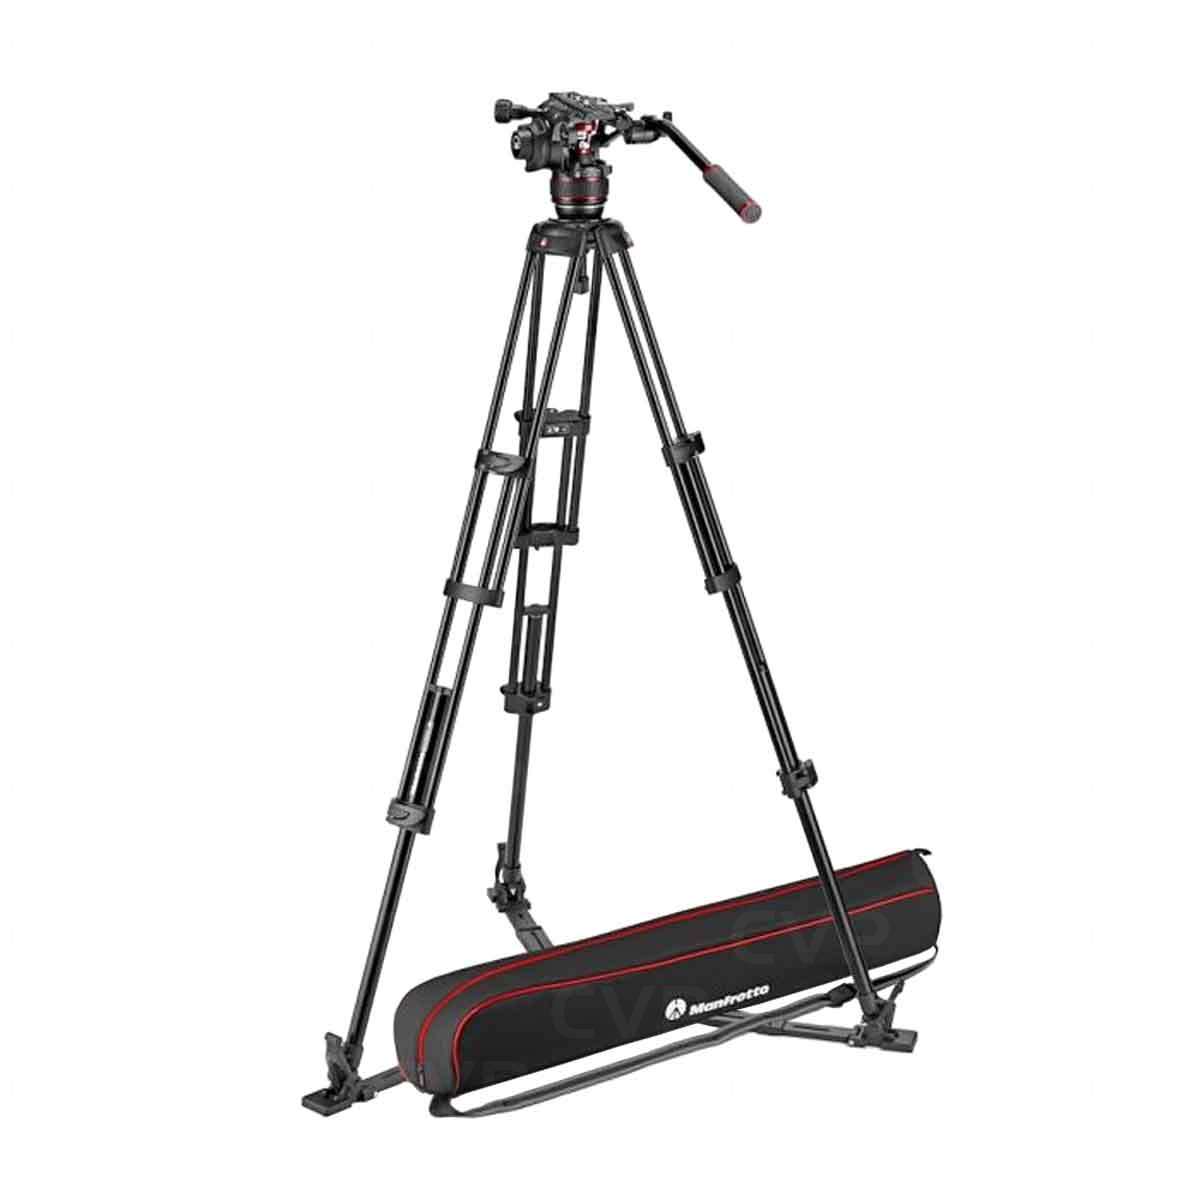
I’ve settled on the Manfrotto MVK502AM-1 Tripod System for the tripod setup. This tripod comes with the Nitrotech 608 fluid video head, which has a flat base, and the MVTTWINGA aluminium twin-leg tripod with a ground spreader for stability.
The Nitrotech 608 head boasts a continuous counterbalance system, allowing for precise control over the camera and accessories weighing up to 8 kg at a 55mm centre of gravity. This means you can maintain steady control over your camera, regardless of the weight or the angle of tilt you choose, making operation smooth and effortless.
Additionally, the system features a variable continuous fluid drag system, driven by a new fluid technology. This innovation ensures the smoothest pan and tilt movements without any judder.
The head boasts a 3/8” Easy Link, complete with an anti-rotation system, compatible with Manfrotto arms that have the same feature or arms with ARRI locating pins, ensuring secure attachment of external monitors or other accessories. The side-lock mechanism on the sliding plate attachment enables a safe, swift, and straightforward camera setup. The Nitrotech head’s flat base mount includes a standard 3/8” thread, offering great flexibility for various support combinations like tripods, sliders, jibs, or cranes. A 75 mm half ball connects the head to the tripod.
The MVTTWINGA aluminium twin-leg tripod with a ground spreader is crafted for professional use, boasting a two-stage, solid, and stable construction suitable for diverse projects. This essential tripod for producing professional-grade videos or films features an aluminium casting 100mm bowl and an adapter to convert it to a 75mm bowl.
The tripod features a ground-level spreader with telescopic arms for precise leg angle adjustment. It’s also detachable, compatible with the Manfrotto 537SPRB middle spreader and 565 rubber shoes, available separately. The leg locks are sturdy and dependable, and it comes with twin spiked feet for outdoor use, like on grass. For added versatility, it’s compatible with dollies such as the 114MV and 181B. The kit also comes with a padded carrying bag to make lugging it around bit easier.
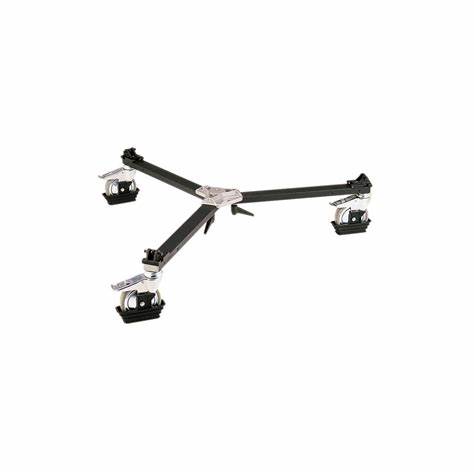
I’ve combined the Tripod System with the Manfrotto 114MV Cine/Video Dolly for secure, heavy-duty support that guarantees absolute stability. It’s designed to ensure even the heaviest equipment stays put, making it a must-have on any set.
It’s crafted from sturdy aluminium and built to endure the rigmarole camera ops will put it through. Each wheel is equipped with its own brake, ideal for maintaining safety and stability. When it comes time to pack up, this dolly impresses with its ability to fold down neatly and compactly, making it perfect for slipping into your kit bag, moving to different locations, or storing away after a shoot. We’ll pair the jib with the tripod and dolly system from the mobile camera setup.
Jib Setup
Rigging a camera on a jib involves combining elements from both setups and adding some extras. For the uninitiated, a jib is a type of crane designed for mounting a camera on one end, with a counterweight on the other to maintain balance. It’s versatile, allowing for a range of shots like overhead views or extensive sweeping movements, and it’s capable of filming a full 360-degree panorama.
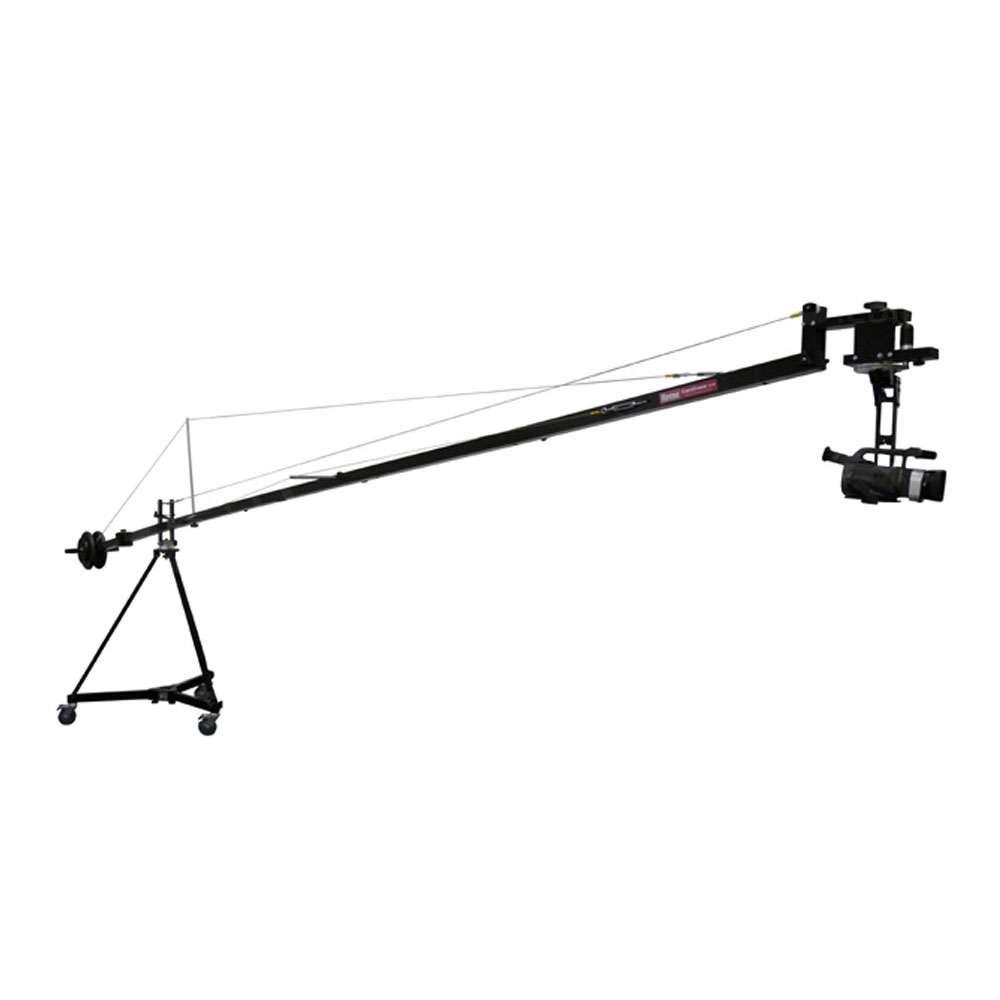
To start, we’ll need a Jib Arm, and I’ve chosen the Hague K18-PH200 CamCrane Camera Jib. This camera crane is versatile, user-friendly, and can be quickly set up on any robust tripod. It’s perfect for handheld camcorders and DSLR cameras up to 4kg. Offering a maximum height of 7 meters and full 360-degree panning, the CamCrane provides extensive movement possibilities. For added stability, it can be shortened and used with support cables. The included PH200 Pro Pan & Tilt Power Head has adjustable weights and a monitor bracket for convenient shot monitoring.
The power head operates with two custom-geared motors and features a variable speed controller for smooth movement. It’s designed for easy mounting to balance the camera on its plate. The joystick control enables simultaneous panning and tilting, with speed adjustments available. The control box is equipped with sockets for power, a control cable, and a composite video output for monitoring purposes (though we won’t be using it). Constructed from aluminium, the crane is easily collapsible for transportation.
Given the challenge of monitoring the Studio Camera’s screen from 7 meters away, we’re opting for the Micro Studio Camera 4K G2 paired with the Panasonic Lumix G X Vario PZ 45-175mm f/4.0-5.6 lens, the same as our fixed camera setup. This combination maintains the visual consistency with the other cameras while incorporating Focus and Zoom controls, which I’ll detail in the following section, allowing the camera operator to manage the camera directly.
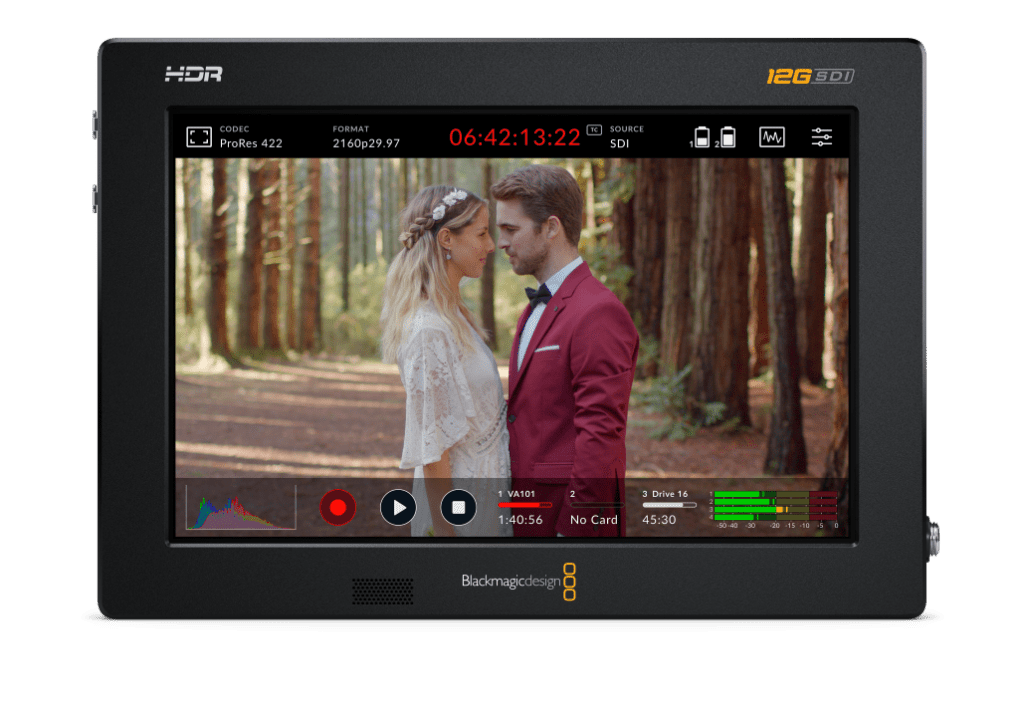
To ensure the camera operator can see what’s being captured, we’ll equip the Micro Studio Camera with a Video Assist 7” 12G HDR. This Blackmagic Video Assist enhances any SDI or HDMI camera with professional monitoring and recording capabilities across HD, Ultra HD, 2K, and 4K DCI formats. Its bright 2500nit 7-inch HDR display supports 3D LUTs and includes professional scopes, focus assist, and exposure tools for precise focus, exposure, and framing. Although not needed for our purposes, it also boasts dual SD card recorders for saving files in 10-bit 4:2:2 ProRes or DNx formats. Additionally, it offers two mini XLR inputs with 48V phantom power and a low noise floor of -128dBV for superior audio recording. The best part? You can jump straight into editing without needing to convert the files.
Accessories


Now that we have the camera and the ability to move it, the next step is to control it and transmit the video feed throughout the venue. Blackmagic offers the Focus Demand and Zoom Demand for controlling focus and zoom, which are attached to your tripod. You will need an extra pan arm, but they are available for approximately £40.
I’ve opted for the Blackmagic Studio Converter to manage the video feed from the camera. The 10G Ethernet capability of both the Blackmagic Studio Converter and the Blackmagic Studio Camera Pro means you can transmit all camera signals through a single Ethernet IP link. This setup sends the camera feed, return program feed, timecode, reference, tally, talkback, and control signals all through one cable. It offers the same advantages as SMPTE fiber, but at a much lower cost thanks to the use of standard 10G copper Ethernet cables. The Blackmagic Studio Converter also facilitates the breakout of all video, audio, and talkback connections in the control room, and it comes with a substantial power supply that delivers power to the camera via the Ethernet cable, eliminating the need for a local power source. I really wish they made something similar for the Micro Studio Camera, having a simple one-cable setup for each camera would make rigging so much easier.
To convert the SDI camera outputs to ethernet, similar to studio cameras, an SDI to 2110 IP Converter is used. The Blackmagic 2110 IP Mini BiDirect 12G is ideal for this purpose. It features a 12G-SDI connection that supports SD, HD, and Ultra HD formats up to 2160p60 and can handle SDI program returns. This converter also includes a 5-pin XLR talkback headset connection with volume control and a press-to-talk button. It connects via 10G Ethernet and can also be powered by a DC power supply.
We’ll be using the Blackmagic 2110 IP Presentation Converter, a versatile device perfect for speaker podiums, providing integrated connections for laptops, projectors, and microphones. It enables USB-C connectivity for computers, managing both video and power and offers an HDMI output for projectors. Users can switch the output between the video input and the 2110 IP return feed. For audio, it features XLR inputs for microphones and an XLR output for PA systems. Plus, the RJ-45 10G Ethernet video connection can power the converter while simultaneously charging a USB-connected computer.
To integrate the two converters with our switcher, an IP 2110 IP converter is necessary. The Blackmagic 2110 IP Converter 8x12G SFP is ideal for this purpose. It enables the addition of SMPTE-2110 IP video into 12G-SDI broadcast systems. This converter boasts 8 independent bidirectional 12G-SDI to SMPTE-2110 IP video conversion channels, utilizing SFP modules to ensure compatibility with optical fibre Ethernet for extended reach. The unit’s 1RU form factor comes with a control panel featuring an LCD, and it supports both HD and Ultra HD formats up to 2160p60.
Recording, Playback & Live Graphics
The decision to exclude recording media from the camera setup is intentional to avoid the hassle of retrieving media from the Micro Studio Cameras whenever footage is needed. Recording will be handled in the control room, streamlining the process and reducing the camera operator’s workload.
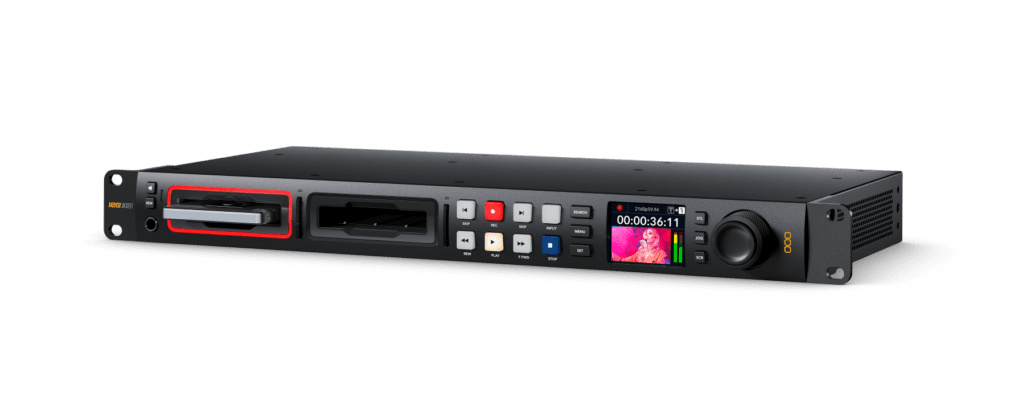
We’ll be capturing the video feeds and the program feed using the HyperDeck Studio 4K Pro. This device enables you to record high-quality video files straight onto SD cards and SSDs. Sporting a sleek design, it supports various codecs and operates with quiet cooling. The entire HyperDeck Studio line now offers recording capabilities in H.264, Apple ProRes, or DNxHD formats, accompanied by either PCM or AAC audio. The 4K model we’re considering also supports H.265 files. Once the recording is complete, you can easily mount the media on any computer and access the files with the video software of your choice. Additionally, for ISO recording, it comes equipped with timecode and reference generators, making it a breeze to sync multiple units.
The newest software update for HyperDeck Studio models introduces the capability to record straight to network storage. This advancement allows for the creation of a HyperDeck Studio recorder array, capable of capturing several camera feeds into a unified folder on your network storage. Consequently, any editing platform can effortlessly connect to the network storage and find all the media consolidated in one spot. The process of recording to network disks is straightforward; simply navigate through the network storage servers and pick the desired folder for recording.
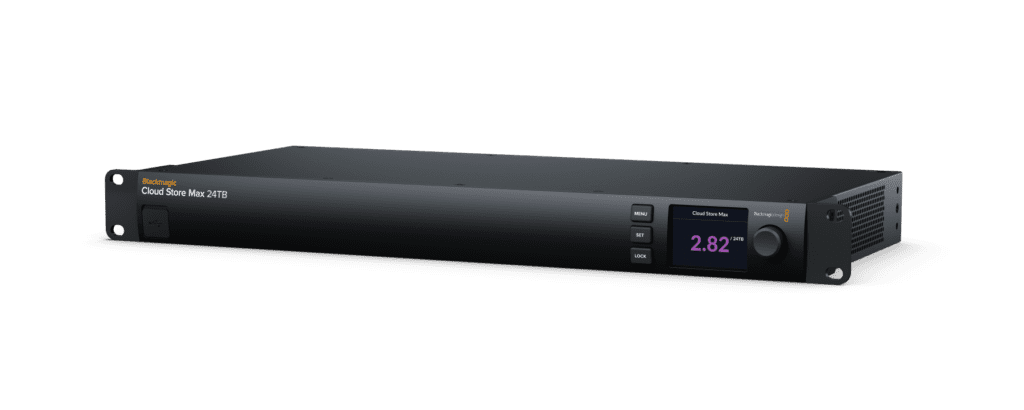
As this is for a permanent installation we’ll be taking advantage of the HyperDeck Studio 4K Pro’s network recording abilities, and Blackmagic’s Cloud Store Max 24TB is the ideal solution. This high-performance flash storage comes in a sleek 1RU package, boasting a 24TB capacity with a 12-card RAID 0 flash memory core. It’s equipped with four 10G Ethernet ports, a 100G Ethernet port, and a QSFP connection for both high-speed copper and longer optical fibre cables. Additionally, it features USB-C connectivity and Blackmagic Cloud sync, enabling global file distribution. Its design ensures rapid access, even when numerous users are accessing files concurrently.
The Hyperdecks can also be used for video play back so we’ll add a couple of extras to our shopping list for just this reason.
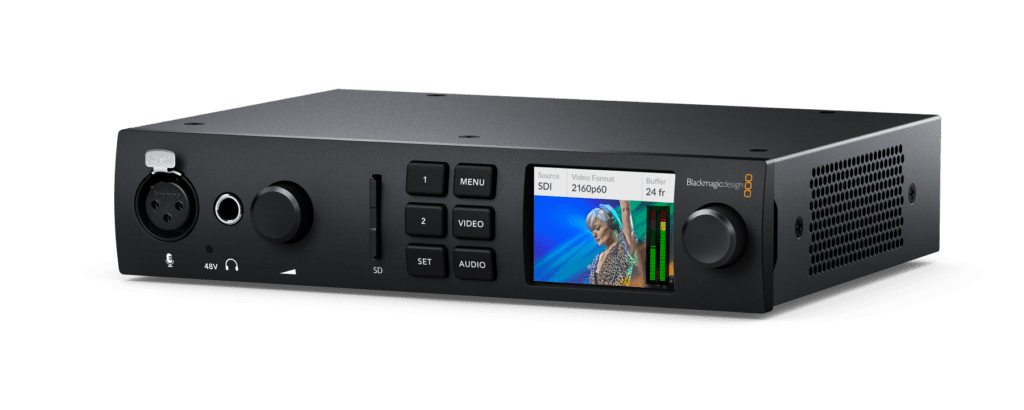
When it comes to using live graphics such as lower thirds, title screens etc we are going to need both a computer, to produce the graphics and an interface to convert it to something the switcher can use. To get the graphics out of the computer, I’ve chosen the UltraStudio 4K Mini. It is a portable Thunderbolt 3 capture and playback solution packed with the latest broadcast technology! You get broadcast quality 8 and 10‑bit high dynamic range capture in all formats up to 4K DCI at 60p, and 12‑bit high dynamic range capture in all formats up to 4K DCI at 30p. Plus, the built-in SD card reader lets you mount camera media directly on your computer so you can start editing immediately!
Video Out
Now that we understand the input for the switcher, it’s time to consider the output destinations. Since this is a permanent installation, we need to distribute feeds to different areas within the venue and also set up capabilities for live streaming.
Control Room
Starting with the control room is key, as it’s where we’ll monitor incoming feeds and manage their distribution. Depending on the space available, we have a few setup options.
The first is to use screens solely for the multiview. It’s not perfect, but it works. You might find yourself doing a ‘manual zoom’ by moving closer to the screen to check a shot, but it’s a straightforward solution when space is tight.
Another option is to add dedicated screens for your Preview and Program feeds. It might seem minor since you can view these in the standard multiview layout, but having them separate frees up space on the multiview for additional incoming feeds if needed.
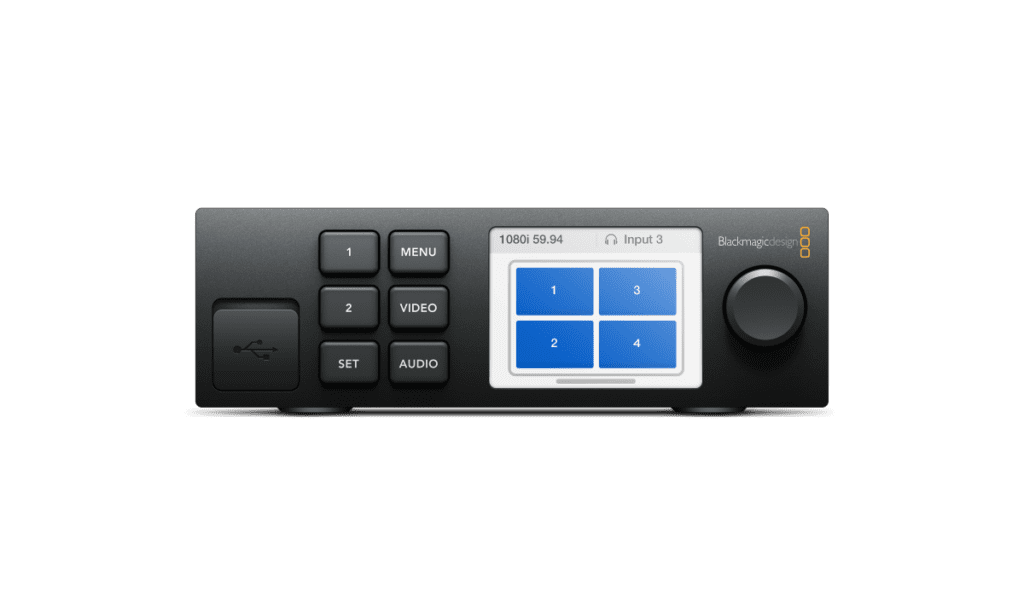
For an even clearer view of each feed, consider using a Blackmagic MultiView 4 to display four inputs on one screen. The Blackmagic MultiView 4 is an innovative multi-viewer that allows you to monitor four completely independent SDI video sources on a single screen. It comes equipped with four 6G-SDI inputs that fully re-synchronize, enabling you to monitor a mix of SD, HD, and Ultra HD video formats and frame rates simultaneously. The MultiView 4 can connect to both 1080 HD and 2160p Ultra HD displays, so you have the flexibility to use it with standard HD or Ultra HD TVs. When used with an Ultra HD display, you’ll benefit from the higher resolution and enjoy full 1920 x 1080 HD resolution in each view, ensuring remarkable clarity. Additionally, you have the option to overlay audio meters, custom labels, and more on each view. However, for the best control, I would recommend using separate Preview and Program screens.
The ultimate setup, if budget allows, is to have an individual screen for each incoming feed. This provides the clearest view of each feed but requires the most space.
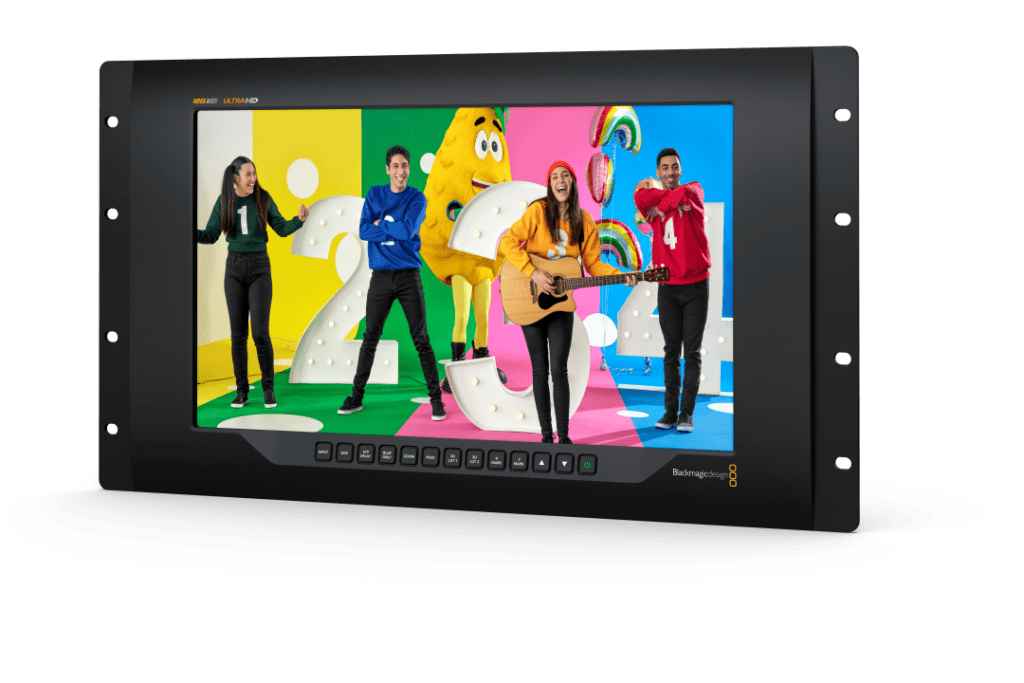
For those in the market for a screen, the SmartView 4K G3 comes highly recommended. It stands out as the first Ultra HD broadcast monitor featuring both 12G-SDI and SMPTE-2110 IP video inputs. The SmartView 4K G3 seamlessly integrates with IP-based broadcast systems and a variety of 12G-SDI professional video equipment up to 2160p60, making it an ideal choice for broadcast and live production environments. It’s equipped with both AC and 12V DC power options, 3D LUTs, and essential monitoring controls like focus peaking, H/V delay, blue only, and framing guides.
LED Wall / Rear stage projector & iMag
The process for getting feeds to your videowall/CYC projector and/or iMag screens is quite straightforward and varies mainly based on the input requirements of your LED Wall, CYC projector, or iMag repeater screens. If your equipment accepts SDI input, you’re all set—just connect an SDI cable from the switcher’s back to your device. If not, you’ll need an SDI to HDMI converter.
It’s best to use a separate Aux output for each device so you can manage different feeds as needed. For instance, you might want a static background on your LED screen, while your iMag screens show a clean feed of the program without any extra graphics.
Dressing Room Feeds
Installing a video feed in your dressing rooms isn’t always essential, but having the necessary cabling can significantly simplify things for your performers. There are various methods to set this up, tailored to each venue’s needs, and I’ve even come up with a unique approach a few weeks back.
SDI Monitors
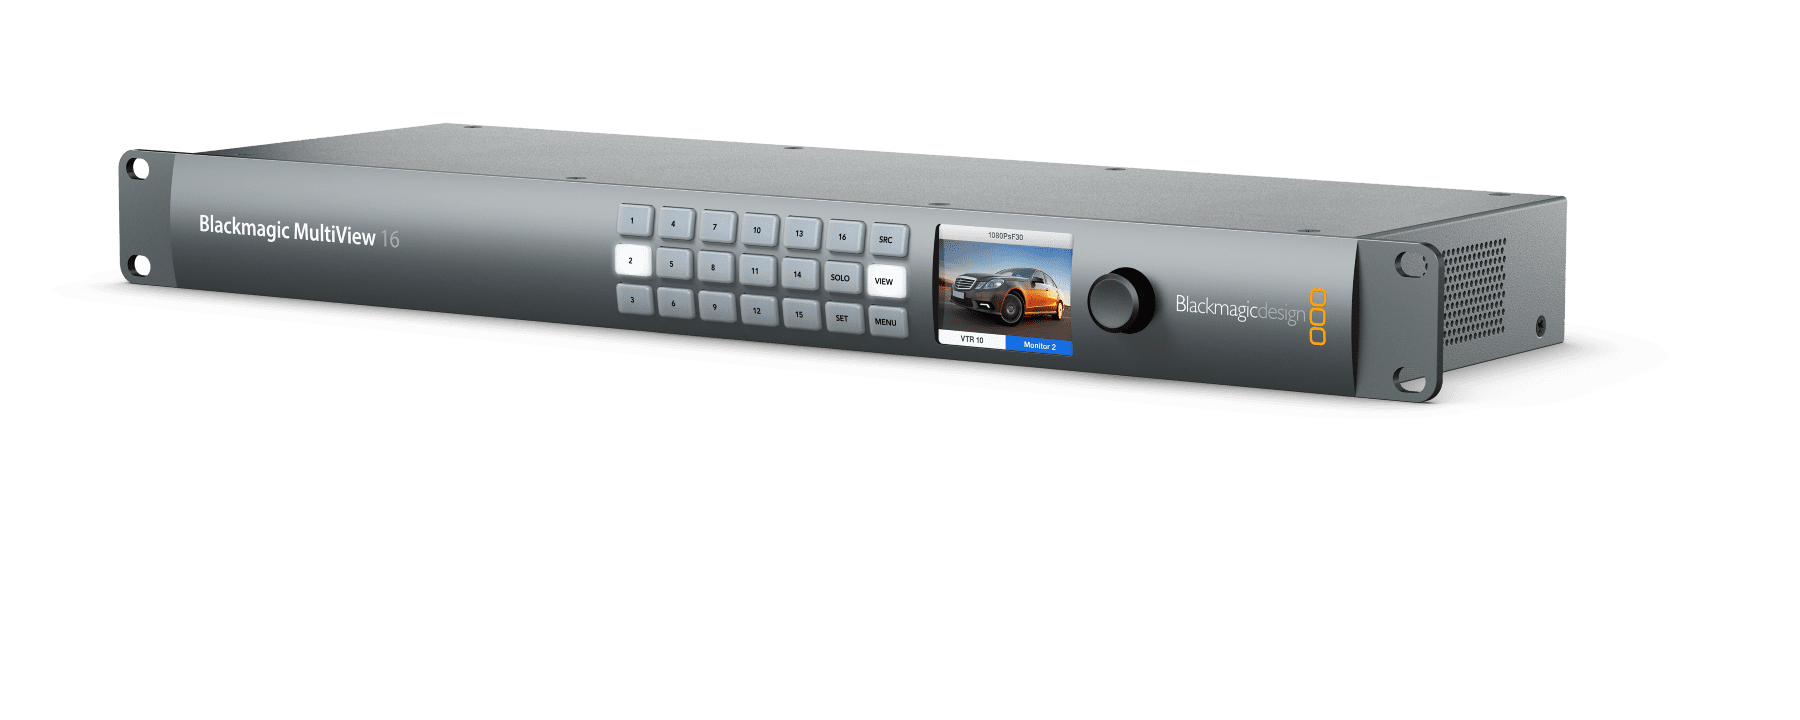
The setup is quite straightforward. Simply take an auxiliary feed from the switcher, connect it to a multiview device like the MultiView 4 or MultiView 16, and then distribute the output to each dressing room. This feed can be used with any monitor that has an SDI input, for example, the SmartView 4K 3G that was mentioned before.
If you’re at an older venue and need to adapt to an older analogue standard, Blackmagic offers the Teranex Mini SDI to Analog 12G. This device converts a 12G signal from the switcher into an analogue SDI signal, ideal for venues whose wiring isn’t up to the latest technological standards.
RF modulator to use TV built-in tuner.
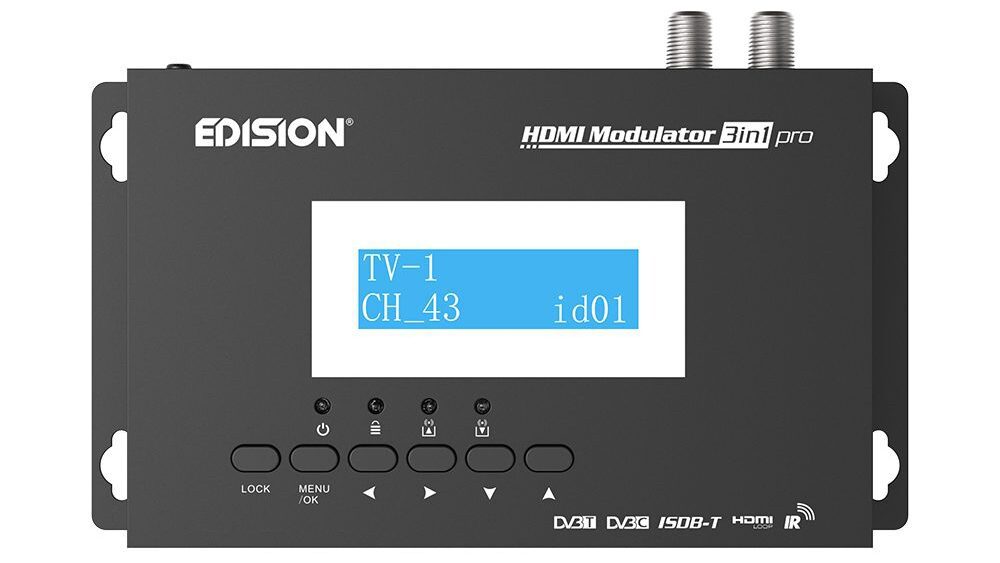
If the dressing rooms are already wired for TV signals through DVB-T/T2 (Freeview), DVB-C/C2 (Cable), or DVB-S/S2 (Satellite), you can use the existing cables without disrupting the performers’ ability to watch live TV. You’ll need an RF modulator to take an auxiliary feed from the switcher, which will then convert it to the broadcast standard your venue uses. If you’re starting from scratch, the Freeview option might be the best bet, depending on your area’s signal strength.
I found an EDISION HDMI Modulator 3in1 pro on Amazon for £150 that converts an HDMI feed into a DVB-T, DVB-C, or ISDB-T feed. To connect it to the Switcher, you’ll need to convert the aux output to HDMI, (which Blackmagic have numerous devices for), and attach an F-Type connector to the cables from the aerial to the TV. It’s a fairly straightforward setup.
HbbTV App.
My concept is based on the research I conducted for developing a smart TV application. By using the same equipment mentioned in the Live stream section, you could “broadcast” to a computer within your network. This computer would run a web server and video server capable of converting the RTSP feed from the Blackmagic Web Presenter 4K into an MPEG DASH stream, using software like Mist Server. This stream could then be accessed through an HbbTV app, displaying a live feed of the show within the app. Additionally, the app could provide information such as show details, runtime, or even scene numbers. The idea is to automate this process, possibly integrating it with lighting desk cues, although I’m still figuring out that part. Once the app is configured, simply direct your Smart TV to your custom app, and you’re all set.
Live Stream
Since the events of 2020, live streaming has surged in popularity, and it’s a trend that’s wise to incorporate into our event planning. Even before that year, I advocated for organizers to stream their events as a means to boost revenue. The concept is simple: sell online-only tickets at a reduced rate and provide access through a private YouTube link or similar platform. This link could also be included with the standard ticket, allowing attendees to revisit the event and relive their experiences.
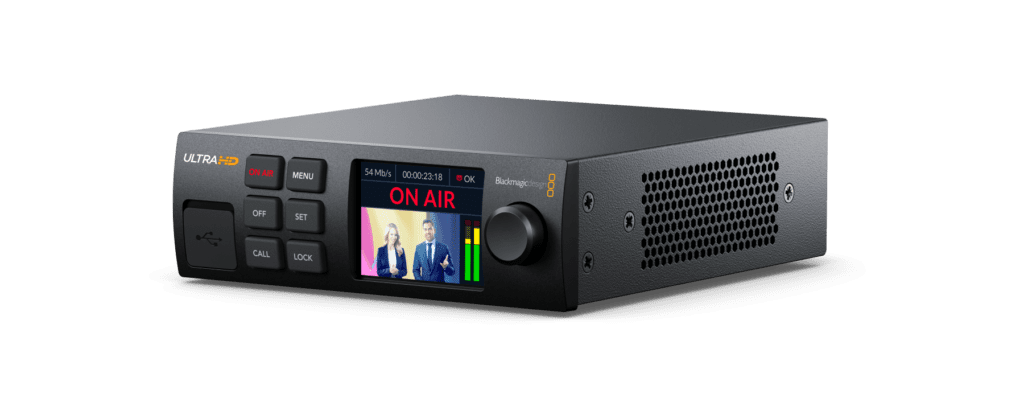
Blackmagic offers some handy devices for our needs, including the Blackmagic Web Presenter, available in both HD and 4K models. We’ll opt for the 4K version for this setup. The Blackmagic Web Presenter 4K is a top-notch streaming solution for both HD and Ultra HD, featuring a professional hardware streaming engine capable of broadcasting up to 2160p60 directly to platforms like YouTube, Facebook, and Twitter. It also allows streaming over Ethernet or via mobile data by connecting a 5G or 4G phone. Its USB connections function similarly to a webcam, enabling you to hook up a computer and use any video software. Additionally, it provides a monitoring output that includes video, audio meters, trend graphs, and more. You can even utilize the aux output from your switcher to send a camera feed to a Teams or Zoom call, simply by selecting one of the stage cameras instead of the program feed.
Switcher & Control
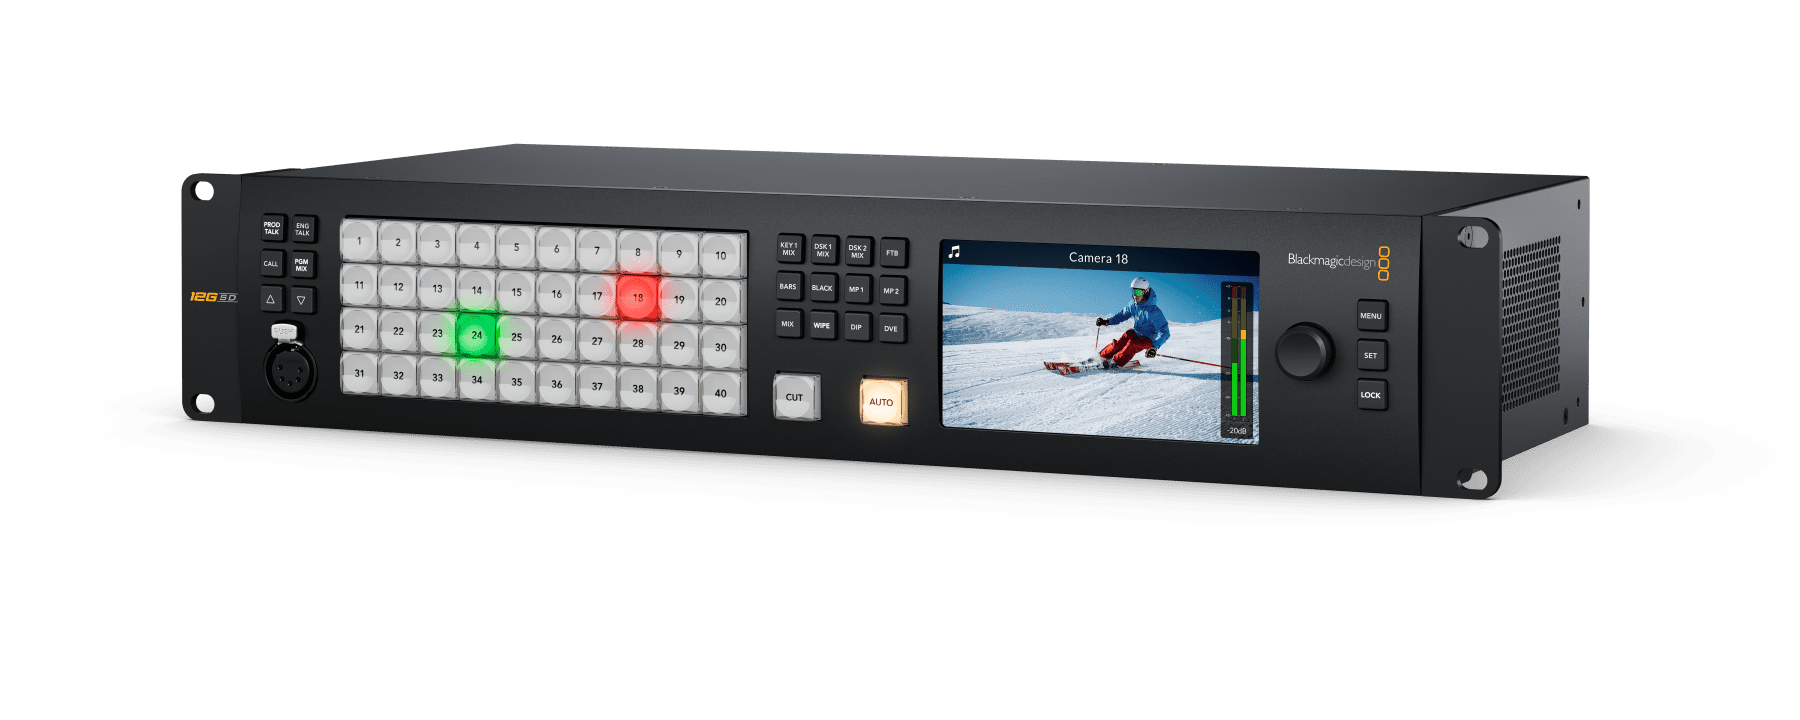

We’ve got a clear picture of the devices we’re integrating into our switcher and the video outputs required for full control. The cornerstone of our setup is the Switcher, and I’ve opted for the ATEM 4 M/E Constellation 4K. This beast of a switcher boasts a 4 M/E Ultra HD live production capability, complete with 40 standards-converted 12G-SDI inputs, 24 12G-SDI aux outputs, 4 DVEs, 16 ATEM Advanced Chroma Keyers, 4 media players, 4 independent Ultra HD multi-views, 2 SuperSource processors, and more. It even includes built-in talkback and a top-notch 156-channel Fairlight audio mixer with EQ and dynamics. For audio mixing, we’ll be utilizing the MADI interface along with the Dante Audio Solution I detailed previously, ensuring crisp audio for live streaming and distribution to the dressing rooms and beyond.
While the interface on the switcher’s front and the companion computer app are handy, nothing beats having a physical control surface. Blackmagic’s ATEM 2 M/E Advanced Panel 40 has got this covered. This model boasts two M/E rows, each with 40 input buttons and four dedicated system control LCDs. Additionally, each row can manage up to four M/Es in larger switchers. Custom labelling is made easy with LCDs on both rows and all input buttons, and each row features its own independent select bus.
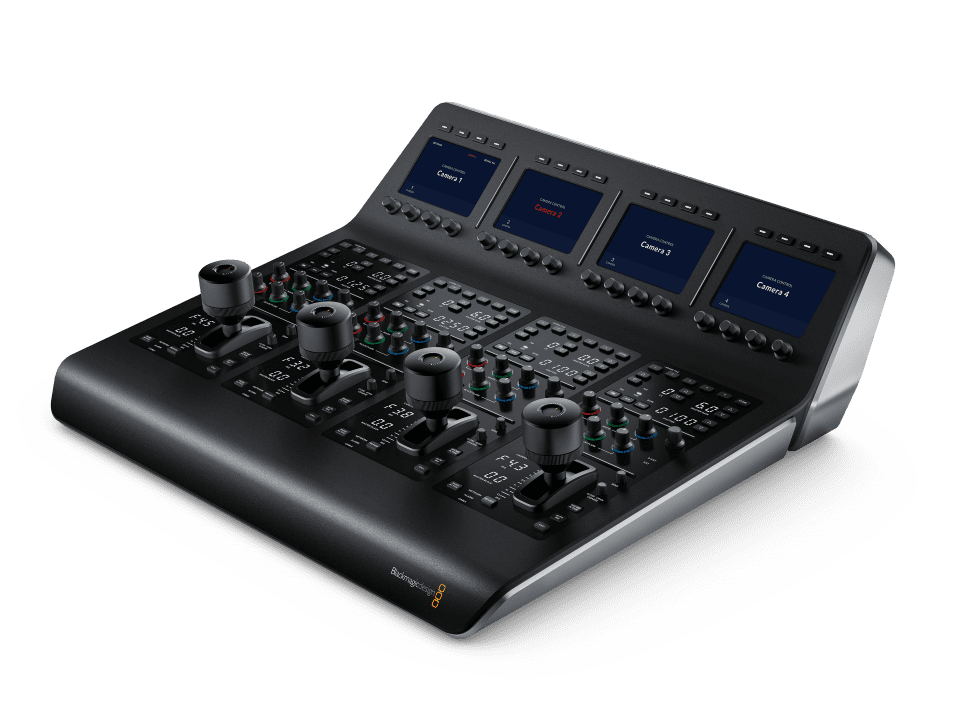
Blackmagic also helps us simplify camera control with the ATEM Camera Control Panel. This single panel allows for independent manipulation of up to four URSA Mini, URSA Broadcast, Blackmagic Studio, and Micro Studio cameras. It offers a range of controls including iris, shutter speed, white balance, master gain, pedestal, and RGB adjustments for white and black levels, among others. The convenience is enhanced as there’s no need for multiple panels; switching the camera selection for each control interface is straightforward.
So those are my recommendations for a permanent Blackmagic Multi-Camera Setup installation. I’ve omitted a price list and the quantity of each item, as every venue is unique. For those curious, using my Mini Stadium space as an example, I’d place two cameras on stage right—one aimed at the audience and another angled towards the drummer. Next, I’d position two cameras on dollies moving across the stage front, a jib to the audience’s left on the main floor, and another two cameras on dollies at the auditorium’s back. A fixed camera would be mounted in the middle of the first balcony, focusing on the stage, with two additional studio cameras at the corners of the first balcony, sans dollies. This setup would ensure extensive coverage, though it would indeed be quite the investment.
What are your thoughts? Are there any changes you’d suggest? Could there be alternative methods to deliver the program feed to the dressing room? If there’s anything I’ve overlooked, feel free to point it out in the comments below or reply to the social media post that brought you here.