Access your home lab without opening ports on your firewall.
We recently changed our internet service provider from Vodafone to TalkTalk and one of the things I didn’t think about was accessing my home lab from outside the network. I just thought that I could open a few ports and Bobs your uncle. Turns out that TalkTalk’s Modem doesn’t allow you to open certain ports, which wouldn’t be a problem if I wasn’t running Nginx Proxy Manager to router tariff, requiring ports 80 & 443, and the 2 ports that TalkTalk have block being, you guessed it, 80 & 443.
So after a few days of banging my head against a wall trawling through forums, I came across Cloudflare Tunnels. Tunnels are part of Cloudflare’s Zero Trust Platform and allow you to send web traffic to your home lab by creating a tunnel out from your server to Cloudflare and then they use their infrastructure and technical wizardry to allow access to your services without opening any ports on your modem.
I thought this was so amazing that I thought I’d share it with you. Not only that I thought I’d write a short tutorial on getting Cloudflare Tunnels set up on Docker. So I’ve set up a free Instance on my Oracle Cloud Account that I’m going to set up docker on, run a container then open a Cloudflare Tunnel so I can access it from the outside world without having to mess with port forwarding.
I’ll say it now in case anyone is tempted that the instance is only temporary for this tutorial and has already been deleted so don’t be surprised if it doesn’t work should you try to access it.
Setting Up Docker
As I’m starting from a fresh install of Ubuntu 20.04 Minimal on my Oracle Cloud Instance, I thought this might be the best place to start this tutorial of sorts.
STEP 1 – Connect to Your Instance via SSH
If you are using an Oracle Cloud Instance like myself you’ll need to you a command like the one below to access your instance. (Just make sure to change the file path, username and IP address)
ssh -i <private_key_file> <username>@<public-ip-address>STEP 2 – Update everything
If you have also decided to go with ubuntu use the commands below to make sure your instance is us to date.
sudo su -

apt update

apt upgrade -y
STEP 3 – Install Docker
Before we install docker we need to set up the repo. Follow the commands below to install the repo and docker too
apt install ca-certificates curl gnupg lsb-release

mkdir -p /etc/apt/keyrings

curl -fsSL https://download.docker.com/linux/ubuntu/gpg | sudo gpg --dearmor -o /etc/apt/keyrings/docker.gpg

echo \
  "deb [arch=$(dpkg --print-architecture) signed-by=/etc/apt/keyrings/docker.gpg] https://download.docker.com/linux/ubuntu \
  $(lsb_release -cs) stable" | sudo tee /etc/apt/sources.list.d/docker.list > /dev/null

apt update

apt install docker-ce docker-ce-cli containerd.io docker-compose-plugin
STEP 3 – Install Portainer
Some people might think this is not needed but I prefer to use a graphical user interface when setting this up on my machines. So, as this oracle instance is only going to run docker I’m only going to be installing Portainer rather than installing cockpit as well. As you can get 5 free installs of Portainer-s Business edition that’s the version I’ll be installing today.
docker volume create portainer_data

docker run -d -p 8000:8000 -p 9443:9443 --name portainer --restart=always -v /var/run/docker.sock:/var/run/docker.sock -v portainer_data:/data portainer/portainer-ee:latest
Now that Portainer is installed it’s time to set it up. You’ll need to temporarily open some firewall ports so you can access your Portainer instance if you are using cloud hosting (as each cloud host is different I’ll let you find the details on your cloud hosts website) for now you can just open port 9443
Now that Portainer is installed it’s time to set it up. You’ll need to temporarily open some firewall ports so you can access your Portainer instance if you are using cloud hosting (as each cloud host is different I’ll let you find the details on your cloud hosts website) for now you can just open port 9443
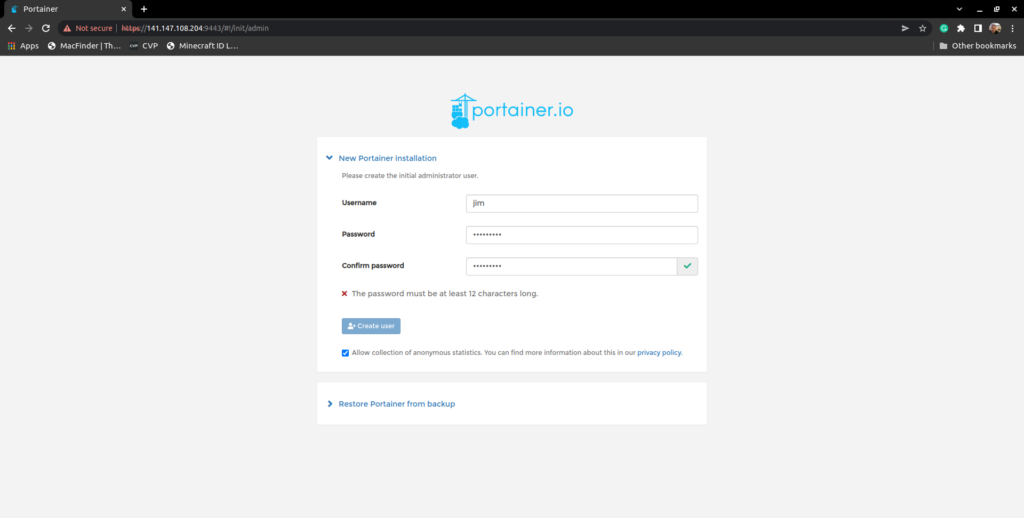
Once that’s done head to https://Your-IP-Address-Here:9443 and follow the props to set up your new Portainer install. On the second screen, you’ll be asked for your Portainer License. If you don’t have one yet click on the Don’t have a license? link and sign up for free to get your 5 free Portainer Business licenses. You should receive an email with your license key shortly.
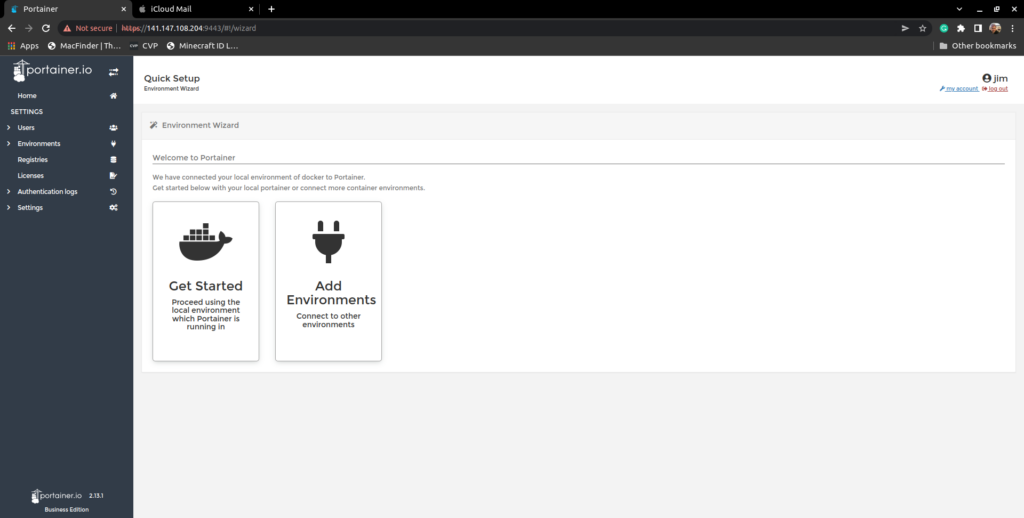
Once you have completed the initial setup You’ll be taken to the Quick Setup Screen. Just click on the Get Started box so that Portainer knows that you are using a local install of docker.
On the next page, under environments, click on the blue dolphin next to local and then click on Container once the next screen loads. This will show you a list of all your containers
Setting Up Cloudflare
Now everything on the server-side is set up it’s time to set up the tunnels themselves. This is a really easy process. You just follow the instructions on the Cloudflare setup wizard and everything works.
STEP 1 – Sign up for or Sign into CloudFlare
This bit’s kind of important as the tunnels won’t work if you don’t have an account. It does involve changing some of your DNS settings with your domain registrar but again Cloudflare are really good a helping you set everything up just follow the wizard (again I’ll let you find the info on how to change your DNS settings on your registrar website)
STEP 2 – Setup a Tunnel
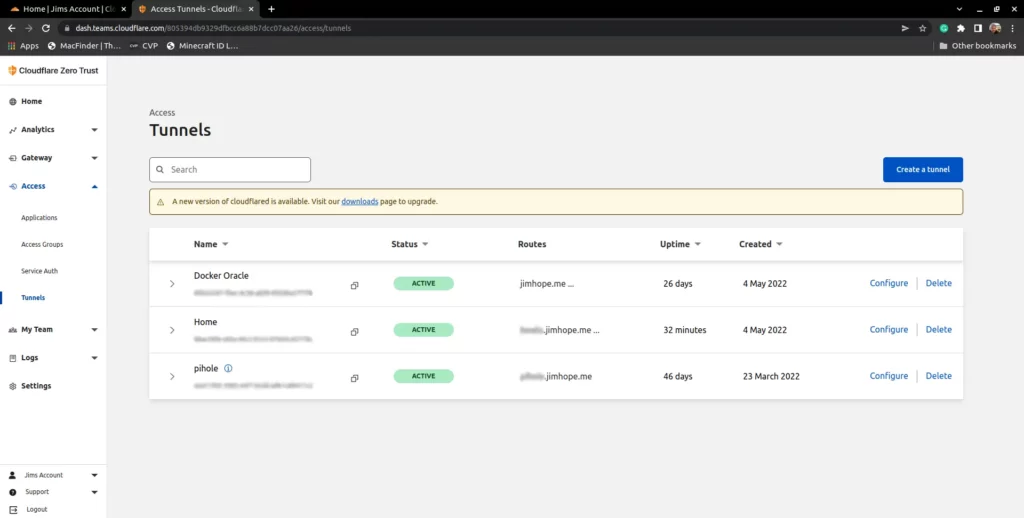
Head to https://dash.teams.cloudflare.com As it has been a while since I set up my tunnels I can’t remember if there was a setup screen here to set up Cloudflare Zero Trust. Just follow the instructions on Screen and eventually you’ll get to the Zero Trust Dashboard. Once there click on Access in the menu on the left and then click tunnels.
The page you come to may be a little different to the one on the right as I already have some tunnels set up. but your next step is to click Create a tunnel
Give your Tunnel a Name. I’ve called mine tutorial as this is a temporary tunnel for this tutorial.
On the next screen, you’ll be asked to configure your tunnel. You’ll see near the top an option to select your environment. Click on Docker. Under that, you’ll get a command to install Cloudflare Tunnel. Copy it and paste it into the same ssh window we used earlier to install docker. When the command has been completed, It’ll show that you have connected to 4 locations, close your ssh client. Go back to the Cloudflare Tunnel config and click next at the bottom of the page.

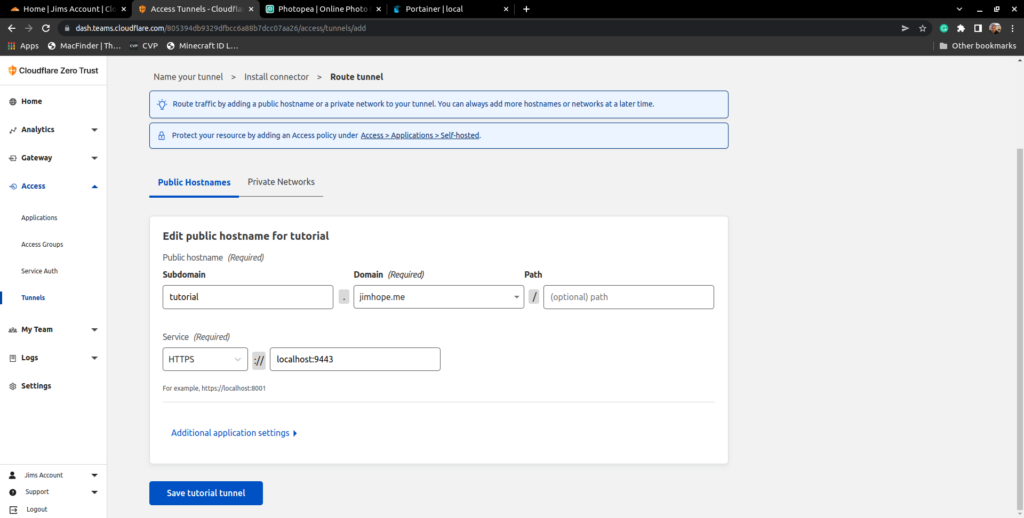
And now we reach the final step. All you need to do now is select your domain (and add a subdomain and/or path if you want them) and then in the service box below put the details of your service.
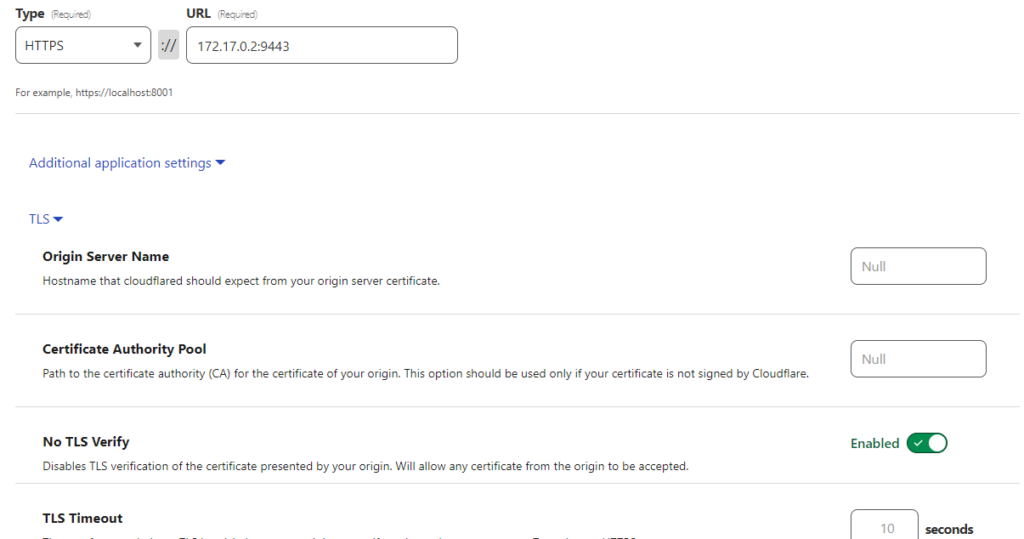
For this, I’ve just used my Portainer instance. so in the first drop-down box I’ve selected HTTPS and in the address box, I’ve entered the IP address of my docker container (172.17.0.2) a colon (:) followed by the port for Portainer 9443. Then click on Save Tunnel at the bottom. Now just head to your chosen web address and there you have it.
FUTURE JIM NOTE: I forgot to mention that if you have a secure web app you would like to tunnel to you may need to enable a setting in the Additional application settings. All you should need to do is enable the No TLS Verify option.
Leave a Reply